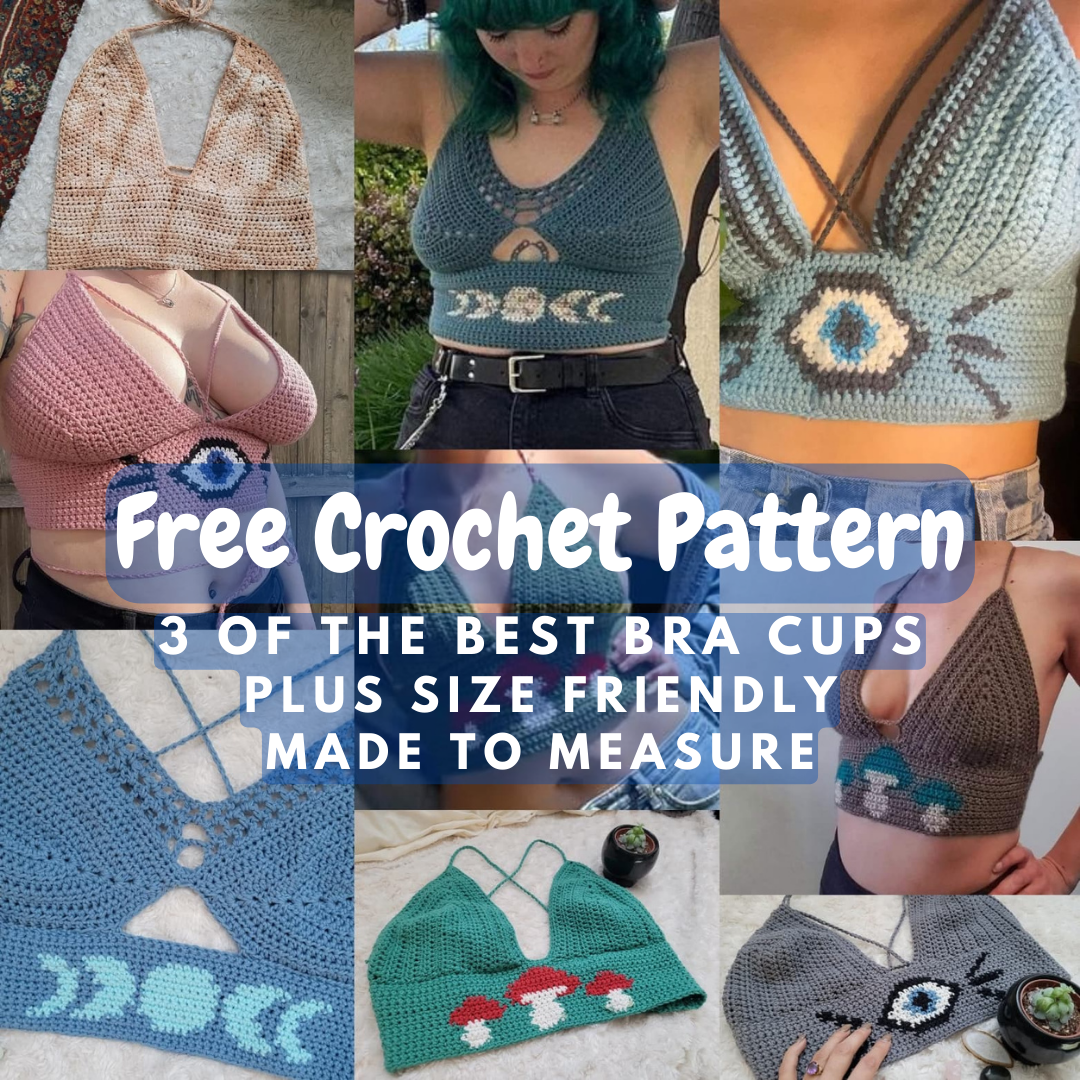
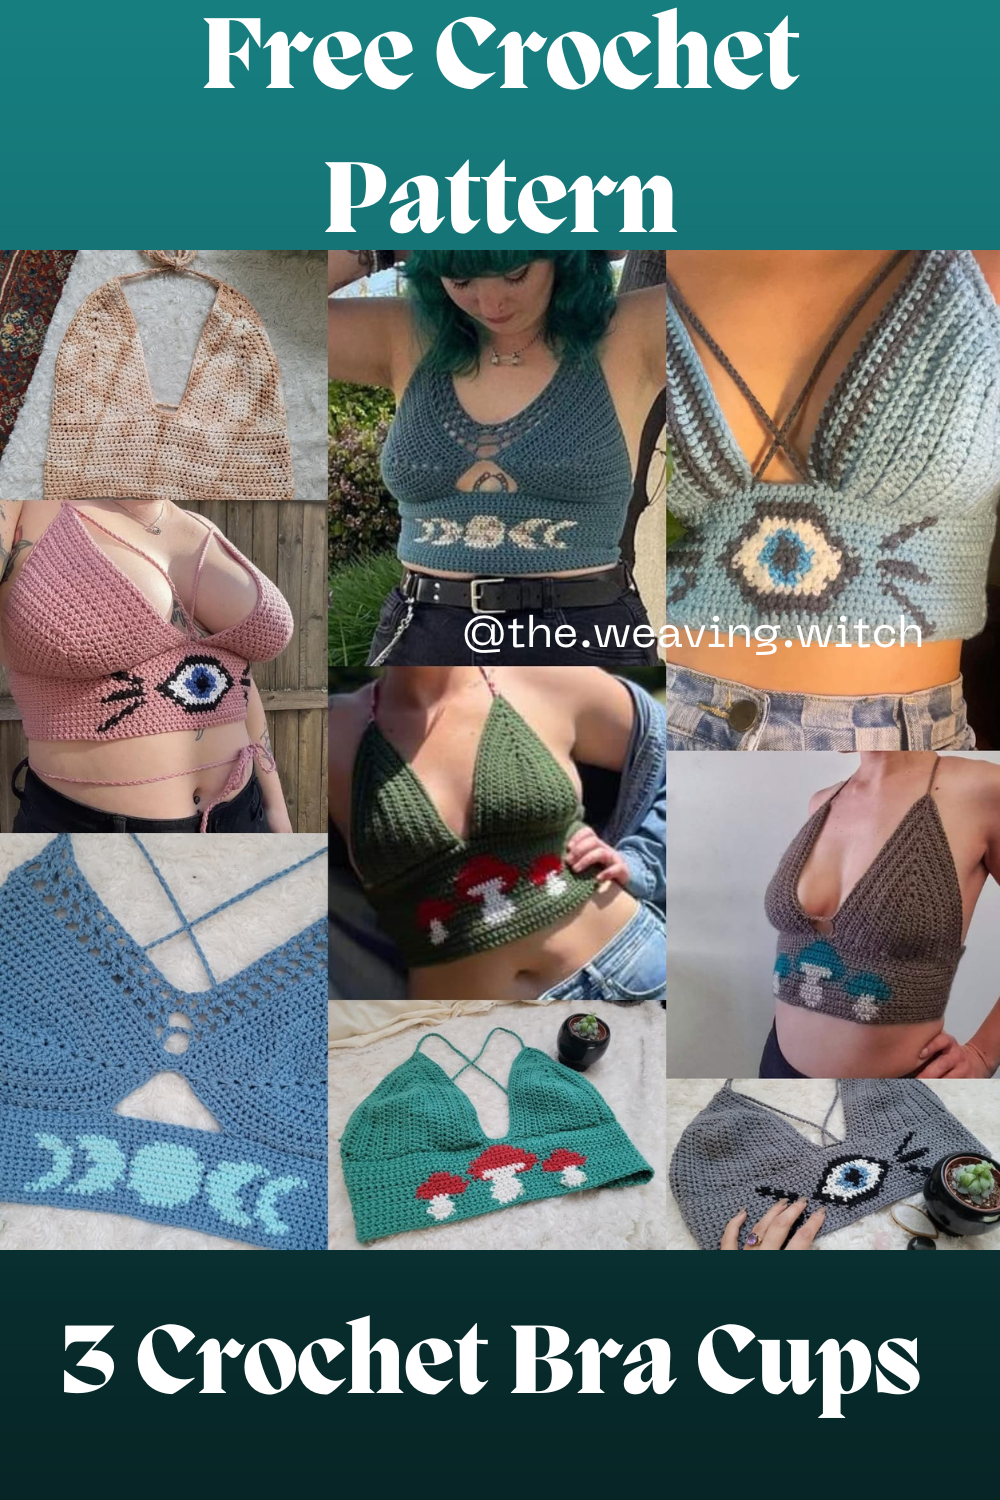
Free Crochet Pattern - 3 Best Crochet Bra Cups!
These are my go-to cups for the perfect summer bralette or dress! They are versatile and size inclusive. The possibilities are endless!
They are all made to measure and are designed to fit all sizes. This blog post features the cups in the photos below. If you would like to purchase the paid patterns for these designs you can find them in my shops here
Thank you so much in supporting my art! You can sell items made from this design in small batches but you must credit Ashly at The Weaving Witch as the designer. You may not mass produce this design. You may not sell or share this pattern. You may not alter or modify this design and claim it to be your own. Also, if you share photos on Social Media of your creations please credit and tag me. Use hashtag #TheWeavingWitch
Instagram: http://www.instagram.com/the.weaving.witch
Facebook: https://www.facebook.com/theweavingwitchco/
Ravelry: https://www.ravelry.com/people/Theweavingwitch
Etsy: https://www.etsy.com/ca/shop/WeavingWitchByAshly
Website: http://www.theweavingwith.com
*this post contains affiliate links, if you click through and make a purchase I receive a small commission at no extra cost to you.
Supplies
Yarn: You’re going to need approx. 175-250 yards of Worsted Weight, #4 yarn
The yarn I used is Paintbox Yarn Cotton Aran. You can get yours using the affiliate link below
https://www.lovecrafts.com/en-us/p/paintbox-yarns-cotton-aran?utm_medium=affiliate&a_aid=8e8bc84a
4.5 mm hook
Tapestry Needle for sewing in ends.
Scissors
Measuring tape.
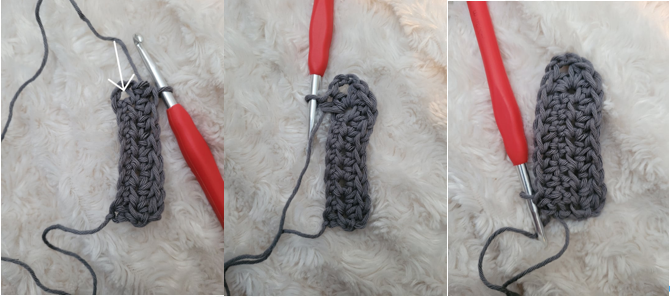
Cup 1

Make 2
You will begin by measuring from the bottoms of your boob/bust to the centre of your boob or nipple.
Make a Ch that equals that measurement, then Ch 2 more
Row 1: Hdc into the 3rd Ch from the hook, and then Hdc into each Ch across, Turn
Row 2: Ch 1, Hdc into each St across until you get to the Ch 2, (2Hdc, Ch 2, 2Hdc) into that Ch Sp, Now working along the backside of your Ch, Hdc into each Ch, Turn

Row 3 (repeating Row): Ch 1, Hdc into each St across, (2Hdc, Ch 2, 2Hdc) into your Ch 2 Sp, Hdc into each St across, Turn
You should be increasing your Hdc by 4 each row.
Repeat Row 3 until you’ve reached the amount of desired coverage.
Optional for larger busted people. When you are getting to your last 2 rows or approx. 1.5 inches to your desired coverage: Switch to doing (Hdc, Ch 2, Hdc) in the Ch space for better/rounder shaping.
Now, you can move onto the Band Section
Cup 2

Make 2
You will begin by measuring from the bottoms of your boob/bust to the centre of your boob or nipple.
Make a Ch that equals that measurement, then Ch 2 more
Row 1: Hdc into the 3rd Ch from the hook, and then Hdc into each Ch across, Turn
Row 2: Ch 1, Hdc into each St across until you get to the Ch 2, (2Hdc, Ch 2 2Hdc) into that Ch Sp, Now working along the backside of your Ch, Hdc into each Ch, Turn
Row 3 (repeating Row): Ch 1, Hdc into each St across, (2Hdc, Ch 2, 2Hdc) into your Ch 2 Sp, Hdc into each St across, Turn
You should be increasing your Hdc by 4 each row. ** (2Hdc, Ch 2, 2Hdc) **
Repeat Row 3 until you’ve reached the amount of desired coverage.
Optional for larger busted people. When you are getting to your last 2 rows or approx. 1.5 inches to your desired coverage: Switch to doing (Hdc, Ch 2, Hdc) in the Ch space for better/rounder shaping.
Once you have finished 2 Cups, do not fasten the second cup and continue to Row 4
Row 4: Ch 1, Sc across until you reach the Ch 2 Sp, Ch 1, Sc into the second cup after the Ch 2 Sp, Sc across, turn
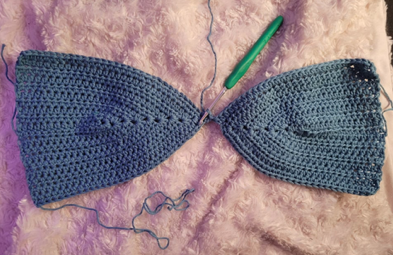
Row 5: Ch 4 (this counts as a Dc and Ch 1), *Sk 1, Dc in next, Ch 1, rep from *until there are 2 sts before the ch 1, Ch 3, Sk 5, Dc in next, *Sk 1, Dc in next, Ch 1, rep from * Turn
Row 6: Ch 3 (counts as Dc), * Dc in Ch 1 Sp, Ch 1, rep from * until the Dc before your Ch 3 Sp, Ch 3, * Dc in Ch 1 Sp, Ch 1, rep from * Dc into third Ch of the turning Ch, Turn
Row 7: Ch 4 (counts as Dc and Ch 1), * Dc in Ch Sp, Ch 1, rep from * Dc into your turning Ch, Cut and Fasten
Now, you can move onto the Band Section
Cup 3

Make 2
You will begin by measuring from the bottoms of your boob/bust to the centre of your boob or nipple.
Make a Ch that equals that measurement, then Ch 1 more
Row 1: Hdc into the 2nd Ch from the hook, and then Hdc into each Ch across, Turn
Row 2: Ch 1, Hdc across, turn
Repeat Row 2 until you have aprox square shape
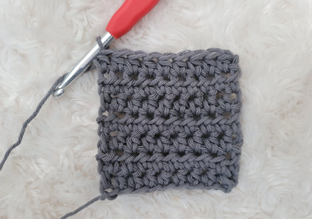
Now, you’re going to continue and work along the side edge of the rows
Row 2b: 2 Hdc into the same st as last, Hdc down the edge, turn
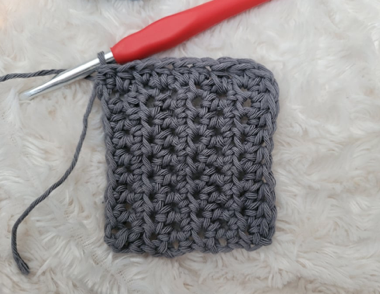
The number of Hdc down the edge should equal to -2 of your starting Hdc
Example: if I had 9 Hdc to form my square, after my 3Hdc, I will have 7 Hdc along the side edge
Row 3: Ch 1, Hdc until you get to the 3Hdc corner you made in the prev Row, Hdc, 2Hdc, Hdc, Hdc across, turn

Row 4 (repeating row): Ch 1, Hdc across, turn

Repeat Row 4 until you get the coverage you desire.
Fasten
Band
I love the versatility of these cups. You can make a lace border along the bottom for the perfect beach-side piece, you could keep it simple and do a solid border of HDC like the first photo below, Or, you can use any of these designs to create a witchy and unique tank top from my shop!

Please tag me on instagram @the.weaving.witch with your finished makes!
Follow me on my socials:
Don’t forget to pin it!
And leave a comment below if you have any questions.
Keep up to date by following me on my Socials